Read our astrophotography tips and capture the beauty of night skies!
09.07.2021
Balmy temperatures, clear skies and a myriad of stargazing events: summer nights are perfect to try your hand at astrophotography. ArianeGroup has tips that will help you capture the beauty of heavens above, from Moon craters to sparkling stars
Preparing
Before you start taking pictures, make sure conditions are optimal: a location with little or no light pollution and a cloud-free sky. Next, prepare your photography equipment: large-scale tripods or mounts, wide angle lenses, remotes, timers… and your camera (of course!).
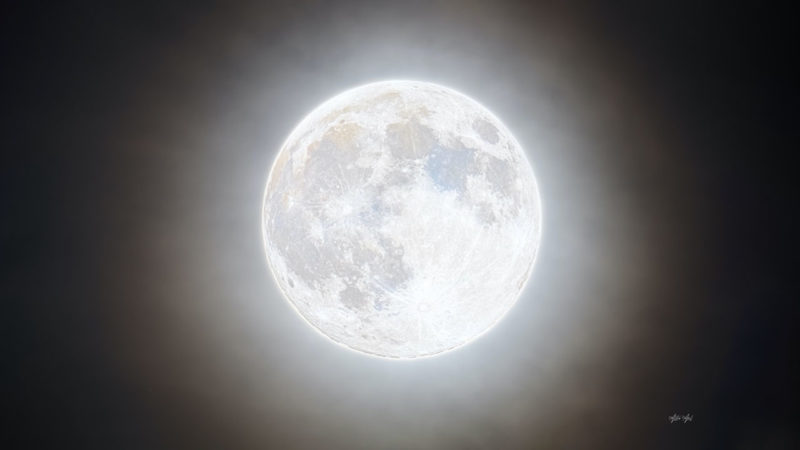
Photographing the Moon
Contrary to popular opinion, taking pictures of the Moon is not that easy and requires a bit of technical know-how. Long focal length lenses are a must for high-quality photos.
Use at least a 200 mm focal lens; 400 mm is ideal. In addition, to avoid blurry photos during exposure due to camera shake, reduce aperture to f/1.
When using a reflex camera, set the camera to manual mode, focus the lens on infinity and use the mirror lock-up mode to improve sharpness.
An efficient method for photography settings is to use the Looney 11 rule: set aperture to f/11, and shutter speed to 1/100e for ISO 100 film.
As a result, your photos of the Moon will not be over or under exposed. It entails, however, taking two pictures and stacking them during post-processing. These settings help capture light from the Moon itself and not from the surrounding landscape.
©Spla_ta: A long exposure photo that captures the luminous sky stacked with a short exposure photo to include the details on the Moon’s surface
Photographing stars
Eager to photograph stars? Remember, urban lighting is not the only source of light pollution; the Moon also lights up the night sky. As a result, avoid taking photos during a full Moon. Instead, plan to go on a shoot during a thin crescent Moon.
A wide-angle lens is best to avoid a “star trail” effect due to star twinkling and the Earth’s rotation, and yet be able to capture as much light as possible. For optimal camera settings, combine a large aperture and short focal length.
You can use a full-frame camera (36 x 24 mm sensor) for a change. Another astrophotography trick, the 500 rule, will help to calculate your exposure time: shutter speed (seconds) = 500 ÷ equivalent focal length (mm).
Keep in mind that exposure time should not be longer than 20 seconds. When it comes to ISO sensitivity settings, we recommend using a minimum ISO of 1,600 and increasing it depending on the results you are aiming for.
@phaelnogueira
Star trails
If, on the contrary, you want your photographs to visually portray Earth’s rotation, a simple camera is not enough. Long exposures require patience. For an even more jaw-dropping effect, create a circular star trail pattern by pointing your lens at the North Pole!
To master this technique, you might want to bring a blanket to lie under the stars since the optimal exposure time is at least 30 minutes… and may require numerous attempts.
To add to the eerie effect of your photographs, stack several images in post-processing for a multitude of sparkling stars in your final composition.
© JeremyThomasPhoto
We hope these tips will help you to capture the beauty of summer’s dazzling night skies.
Tag us on your social media posts: @ArianeGroup.
Are you looking for the best stargazing spots in Europe? We have selected a few for you: https://arianegroup.preprod.apsulis.io/en/news/the-8-best-places-to-stargaze-in-europe/
Happy stargazing!